
Creating a Windows 10 Base Box for Vagrant with VirtualBox
I recently decided to create my own Windows 10 base box for Vagrant. VirtualBox is already allowing Windows 10 virtual machines as of version 5.0 (though Windows 10 is not officially supported). So I decided to go ahead and create a base box for Vagrant for Windows 10 Professional.
I read several articles about creating Windows base boxes for Vagrant. There is plenty of information out there but it is scattered, some of it is old and no longer relevant and most of it is for Windows 8.1 or Windows Server 2012. Some of the information within those articles still applies to Windows 10 and I used the minimum required changes to get my base box working with Vagrant. I will reference the original articles where possible, so you can read them if you wish.
Beginners beware
If you are a complete newbie to Vagrant, wondering what it does, this topic is likely too advanced and will not help you. Read Vagrants online docs or this book.
Vagrants documentation tries to put you off creating your own base boxes, rightly so this is a time consuming process and ideally you would save a lot of time simply using a base box someone else has created.
What you will need to begin
- You will need VirtualBox, get the latest version and the corresponding extension pack.
- You will need Vagrant, again get the latest version. I used 1.7.4
- You will need a Windows 10 ISO file or disc. I got mine from MSDN as part of my subscription. You will need to locate one or get an evaluation version.
You will need a valid license key for the version of windows you are installing if you plan to continue using the machine.
Making the Windows Vagrant box
Making a windows Vagrant box in VirtualBox is four steps:
- Create a VirtualBox virtual machine
- Install Windows on the virtual machine
- Configure Windows for Vagrant
- Package and Export the box through Vagrant
1. Create the virtual machine
Start virtual box and create a new Windows 10 virtual machine. Name it whatever you like, though keep it simple and make a mental note of it as you will need to type this name out later. You want to follow most of the advice given in the Vagrant documentation regarding base boxes1Vagrant: Creating a Base Box (https://docs.vagrantup.com/v2/boxes/base.html).
Specifically,
- Disk Space: Choose a virtual hard disk (VDI) dynamically allocated and choose a high upper limit for the size. The default max-size is pretty low (32GB!) and won’t be much use for anyone and the disk will max out pretty quickly.
- Memory: Choose a lowish value here, reason being users that use the base box can always increase the memory in their Vagrantfile. I chose 2048MB, but 1024MB would do as well.
- CPU: Leave this at the default of 1. Again this is something users can override in their Vagrantfile, so try not to require a higher number to start with.
- Disable any unnecessary hardware like audio. Leave 2D/3D acceleration disabled.
The idea behind these choices is to create your base box as light on resources as possible with as much room for expansion later as possible. When creating a new machine in VirtualBox in the wizard a lot of options are auto-configured so you may need to edit the machine after it is created, going into Settings, to change some options.
Optionally:
- Settings > General > Advanced: Enable bidirectional shared clipboard and drag-drop support.
- Settings > General > System > Motherboard: Disable Floppy boot.
- Settings > General > Audio: Disable audio.
Users of your base box can always modify these options in their Vagrantfile, using the VirtualBox specific configuration.
2. Install Windows
Next boot up your virtual machine in VirtualBox. It will ask you for an ISO file to boot from and you should have your Windows 10 ISO ready at hand. After this, installation is straight forward, if you want Windows to be installed activated, you can enter a license key now, otherwise skip prompts to enter a license key and this can always be entered later through Control Panel.
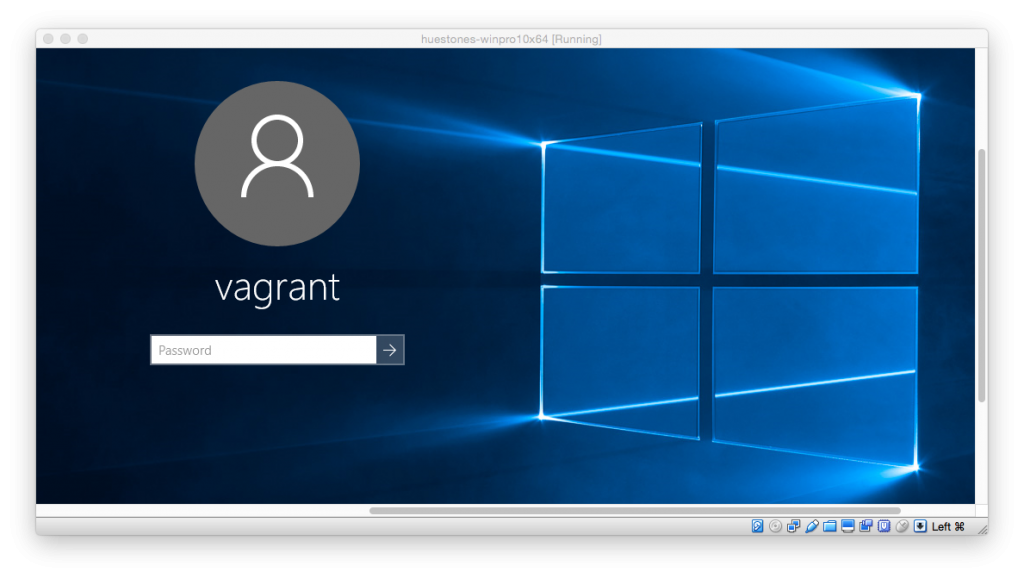
Towards the end of the install you will be prompted to sign into your Microsoft account, again skip this. You want to create a local admin account on your clean install named vagrant with password also vagrant. This is required if you want Vagrant to automatically connect to and provision machines on your base box.
Let the Windows setup complete, you will be presented with a login prompt for your user vagrant. Go ahead and login to the Windows 10 desktop. When connecting to the network windows will ask you if the network you are connected to is public or private. Choose private, otherwise you will get issues with winrm in the next step. Already made the incorrect choice? There is a fix.
3. Prepare Windows for Vagrant
Now we need to open up Windows so Vagrant can connect automatically and provision software for us on the box. These operations should be performed on the newly installed guest Windows 10 OS inside VirtualBox.
- Install VirtualBox Guest Additions on your base box from the VirtualBox menu. Restart if prompted and disconnect any DVD drives still connected.
- I also went into Control Panel > Programs and Features > Turn Windows features on or off and installed .NET framework 3.5.
- Disable UAC2Vagrant: Creating a Base Box (https://docs.vagrantup.com/v2/boxes/base.html): Do this from Control Panel > User Accounts > Change user account control settings, drop the slider to the bottom, Never notify. Additionally open an administrator command prompt window: Type cmd in the windows search bar, right-click and choose Run as administrator on the Command Prompt app. Then type the following and press enter ,
reg add HKEY_LOCAL_MACHINE\Software\Microsoft\Windows\CurrentVersion\Policies\System /v EnableLUA /d 0 /t REG_DWORD /f /reg:64Restart if prompted. - Configure and Enable WinRM service3Vagrant: Creating a Base Box (https://docs.vagrantup.com/v2/boxes/base.html): In the Administrator command prompt paste each line and press enter ,
winrm quickconfig -q

winrm set winrm/config/winrs @{MaxMemoryPerShellMB="512"}

winrm set winrm/config @{MaxTimeoutms="1800000"}

winrm set winrm/config/service @{AllowUnencrypted="true"}

winrm set winrm/config/service/auth @{Basic="true"}

sc config WinRM start= auto
The last line configures winrm services to start automatically. This will allow Vagrant to connect to the box and control it. WinRm is the alternative to ssh for windows boxes. - Relax the Powershell execution policy4In search of a light-weight windows vagrant box (http://www.hurryupandwait.io/blog/in-search-of-a-light-weight-windows-vagrant-box): Run Powershell as Administrator and execute this command:
Set-ExecutionPolicy -ExecutionPolicy UnrestrictedSay Yes to any prompts. This will allow Powershell scripts to provision your base box without annoying restrictions. - Enable remote connection to your box: Control Panel > System > Advanced System Settings > Remote > Allow remote connections to this computer, uncheck the Only allow … NLA checkbox, we are not too fussed about security here. Optionally, While you are in System Properties, turn off System Protection and then on the Advanced tab > Performance Settings, tweak visual effects to your liking, then further on the Advanced tab limit the maximum virtual memory paging file size to 1024MB.5In search of a light-weight windows vagrant box (http://www.hurryupandwait.io/blog/in-search-of-a-light-weight-windows-vagrant-box) Restart if prompted.
- Install all windows updates: Start Menu > Settings > Update & Security > Windows Update > Install any windows updates and restart. Go back into Update & Security > Windows Update > Advanced Options and switch from Automatic to Notify to scheduled restart. Installing windows updates while vagrant is trying to halt your base box will brick your box, so you’ll want to manually restart if updates need installation.
- Finally, clean unused files and zero free space on C drive6In search of a light-weight windows vagrant box (http://www.hurryupandwait.io/blog/in-search-of-a-light-weight-windows-vagrant-box): This is optional but will help somewhat in reducing the compressed size of your base box. On an Administrator command prompt,
C:\Windows\System32\cleanmgr.exe /d c:Download and run the Sysinternals Sdelete utility,sdelete.exe -z c:This zeros out the free space on c: which in turn enables better compression when we come to export the box. - Okay, phew, almost there. Ensure any connected DVD drives, mounted shares etc are disconnected from the VirtualBox menu, restart the virtual machine and ensure all updates have finished installing. Finally if you are happy with the state of the machine, shut it down and get ready to export it as a vagrant box. Don’t be tempted to install additional software on the base box, unless you absolutely need to. You can install everything later using provisioning scripts. You don’t want a bloated base box, it will take longer to download and be harder to maintain.
4. Exporting your base box
Back on your host machine, before you can export your base box for use, you will need to create a new Vagrantfile with some default settings that will allow your users and Vagrant to connect to the box. Here is a complete sample Vagrantfile with most options you need:
# -*- mode: ruby -*-
# vi: set ft=ruby :

# All Vagrant configuration is done below. The "2" in Vagrant.configure
# configures the configuration version (we support older styles for
# backwards compatibility). Please don't change it unless you know what
# you're doing.
Vagrant.configure(2) do |config|
  config.vm.guest = :windows
  config.vm.communicator = "winrm"
  config.vm.boot_timeout = 600
  config.vm.graceful_halt_timeout = 600

  # Create a forwarded port mapping which allows access to a specific port
  # within the machine from a port on the host machine. In the example below,
  # accessing "localhost:8080" will access port 80 on the guest machine.
  # config.vm.network "forwarded_port", guest: 80, host: 8080
  config.vm.network :forwarded_port, guest: 3389, host: 3389
  config.vm.network :forwarded_port, guest: 5985, host: 5985, id: "winrm", auto_correct: true

  # config.vm.provider "virtualbox" do |vb|
  #    # Customize the name of VM in VirtualBox manager UI:
  #    vb.name = "yourcompany-yourbox"
  # end
end
Lets look at those options in some detail,
  config.vm.guest = :windows
  config.vm.communicator = "winrm"
These tell vagrant that this is a windows box and it needs to use winrm to control the box.
  config.vm.boot_timeout = 600
  config.vm.graceful_halt_timeout = 600
Timeouts are in seconds. Windows notoriously installs updates during startup and shutdown. Presently a timeout will cause Vagrant to force kill the machine which will most likely brick the box. Setting larger timeouts hopefully prevents this from happening.
  config.vm.network :forwarded_port, guest: 3389, host: 3389
  config.vm.network :forwarded_port, guest: 5985, host: 5985, id: "winrm", auto_correct: true
This allows Vagrant to connect to the box over WinRm port 5985. It also opens RDP access on port 3389 so the command vagrant rdp will work with your base box. 7Provisioning a Windows box with Vagrant (https://github.com/tzehon/vagrant-windows/blob/master/Vagrantfile).
vb.name = "yourcompany-boxos-version"
Optionally, if you enable this together with the surrounding provider section, when users import your box into Vagrant, the box will appear with the name you provide here inside the VirtualBox UI. Otherwise the box will get an auto-generated random name. If you supply this, make sure it is unique enough to not cause conflicts with other boxes users may have installed.
At this point your base box is being managed by VirtualBox, so to export this as a Vagrant base box use the package command with the --base option on your host machine as follows:
vagrant package --base VirtualBoxVMName --output /path/to/output/windows.box --vagrantfile /path/to/initial/Vagrantfile
Replace VirtualBoxVMName with the name of your base box as it appears in the VirtualBox UI.
Replace /path/to/output/windows.box with the path where you would like the Vagrant base box file to be saved.
Replace /path/to/initial/Vagrantfile with the path to where you created the initial Vagrantfile we discussed above.
Vagrant will now do the rest, you should see it output messages like,
==> default: Clearing any previously set forwarded ports…
==> default: Exporting VM…
==> default: Compressing package to: /path/to/output/windows.box
==> default: Packaging additional file: Vagrantfile
At the end you will get a .box file which is your base box, ready for use.
Using your base box
It should be relatively easy to use your base box.
To add your box to Vagrant you can use
vagrant box add /path/to/output/windows.box --name ANameForYourBox
Then you can bring up the box
vagrant init ANameForYourBox
vagrant up
If everything goes well vagrant up will bring up your box and connect to it. You should also be able to use vagrant rdp to locally remote desktop to the box.
Because we included a default Vagrantfile with our packaged box, the port config, rdp settings, winrm settings are all included by default with the base box8Vagrantfile load order (http://docs.vagrantup.com/v2/vagrantfile/#load-order). This means the Vagrant file now created by vagrant init can just contain provisioning commands.
A known issue with VirtualBox can cause VERR_CFGM_NODE_EXISTS. There is a workaround.
On a Mac use Microsoft Remote Desktop to get around certificate errors during RDP.
You can always start VirtualBox UI and see what is happening with your Vagrant managed box. You can tinker with the settings on the box and export it as a new box using thevagrant package command.
So now you have a working base box, get provisioning.
A known issue #6060 with Vagrant 1.7.4 can cause `assert_command_success’: uninitialised constant WinRM::FS::Core::CommandExecutor::WinRMUploadError during provisioning using OSX hosts. This is not an issue with your base box. Run vagrant plugin install winrm-fs on the host machine to fix it.
References
| ↑1, ↑2, ↑3 | Vagrant: Creating a Base Box (https://docs.vagrantup.com/v2/boxes/base.html) |
|---|---|
| ↑4, ↑5, ↑6 | In search of a light-weight windows vagrant box (http://www.hurryupandwait.io/blog/in-search-of-a-light-weight-windows-vagrant-box) |
| ↑7 | Provisioning a Windows box with Vagrant (https://github.com/tzehon/vagrant-windows/blob/master/Vagrantfile) |
| ↑8 | Vagrantfile load order (http://docs.vagrantup.com/v2/vagrantfile/#load-order) |